
Anyone who’s part of a household where multiple religions are practiced probably knows how interesting certain times of year get! In December our house gets wonderfully chaotic with arrangements for both Hanukkah and Christmas. Between the smell of latkes (Daniel is REALLY good at making latkes, you would never know he’s not Jewish), wrapping gifts, and trying to keep Jody from eating Hanukkah gelt (<- a story for another day), things get busy pretty fast. Decorating an interfaith house for the Holidays can be the visual embodiment of that chaos, and pretty much presents two options. A.) You can go all out with red and green (Christmas), and blue and silver (Hanukkah) or B.) Not do that.
Since my least favorite thing is “busy” decor I opted to go with option B, and set out to decorate our house for the winter holidays in a way that made me feel like a real life Martha Stewart meets Joanna Gaines.
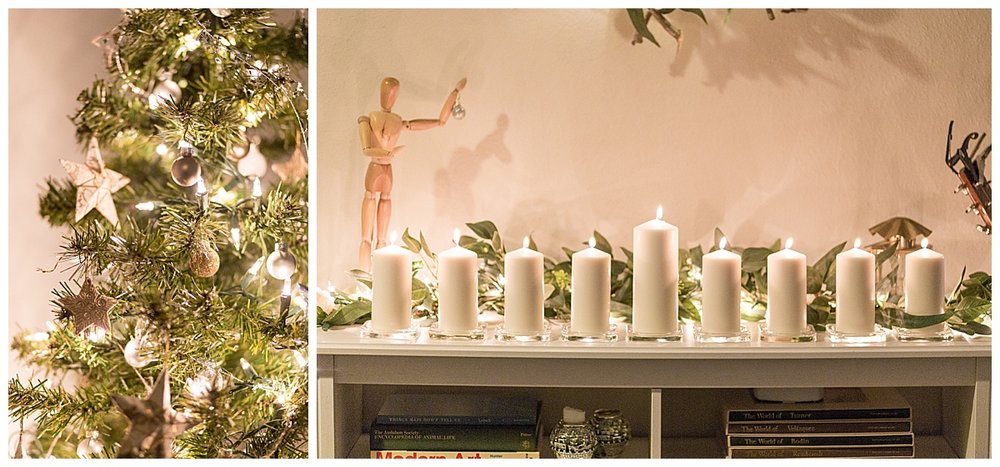
I didn’t go HAM decorating the house, and I decided to focus on three specific areas/elements; the sideboard in our main living space, the wall above it, and the 4ft. Christmas tree/Hanukkah bush that was put next to the fireplace.
Below I walk through each element, explain what I did, and give photo examples.
The Sideboard:
When I pulled out the box of Holiday decor and started setting it up I just wasn’t happy with its contents, or the sizes of the elements I had and how they worked together. I had a couple of pillar candles, a tiny menorah that you can’t buy candles for, and a normal but cheap menorah I bought at Target last year (they literally have the same one every year on their tiny little Hanukkah display that is on the end of one of the aisles). I also had a 12in. fake evergreen tree, a few lanterns of clashing finishes, and a gold tray. If you haven’t guessed yet, THIS WAS NOT GOING TO WORK. All my design sense was going wild with anxiety so I put everything back in the box and came up with what you see below.
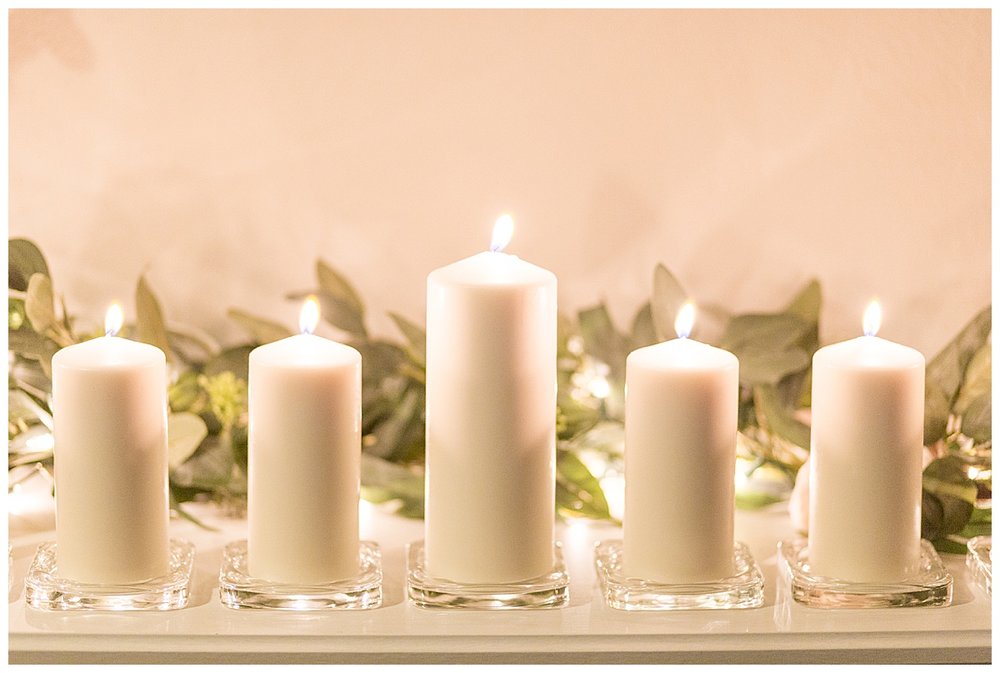
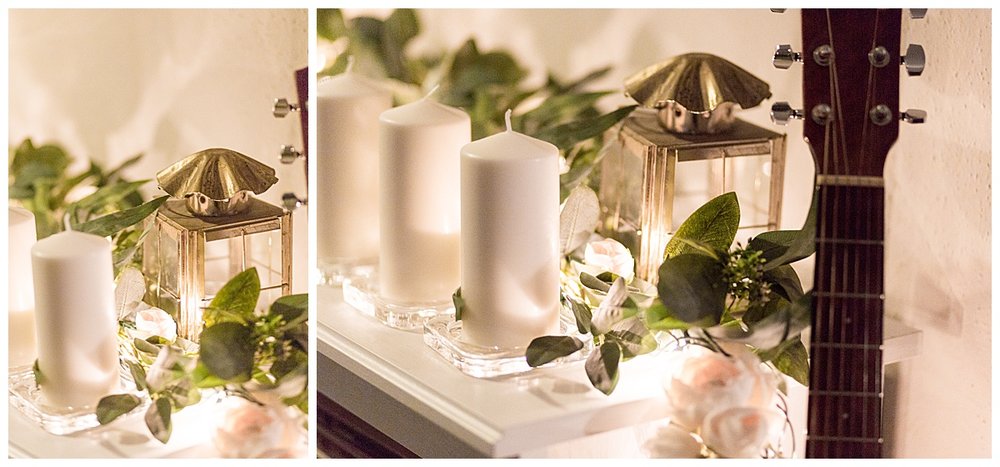
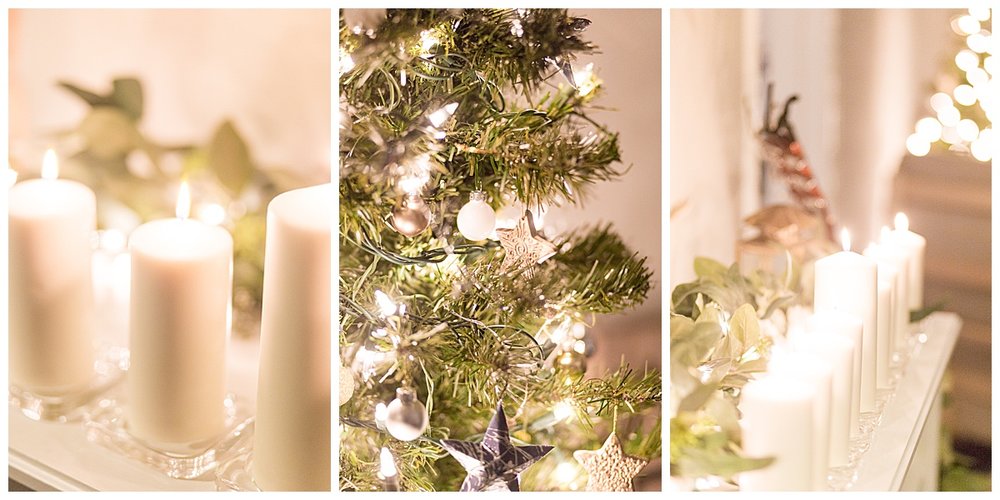
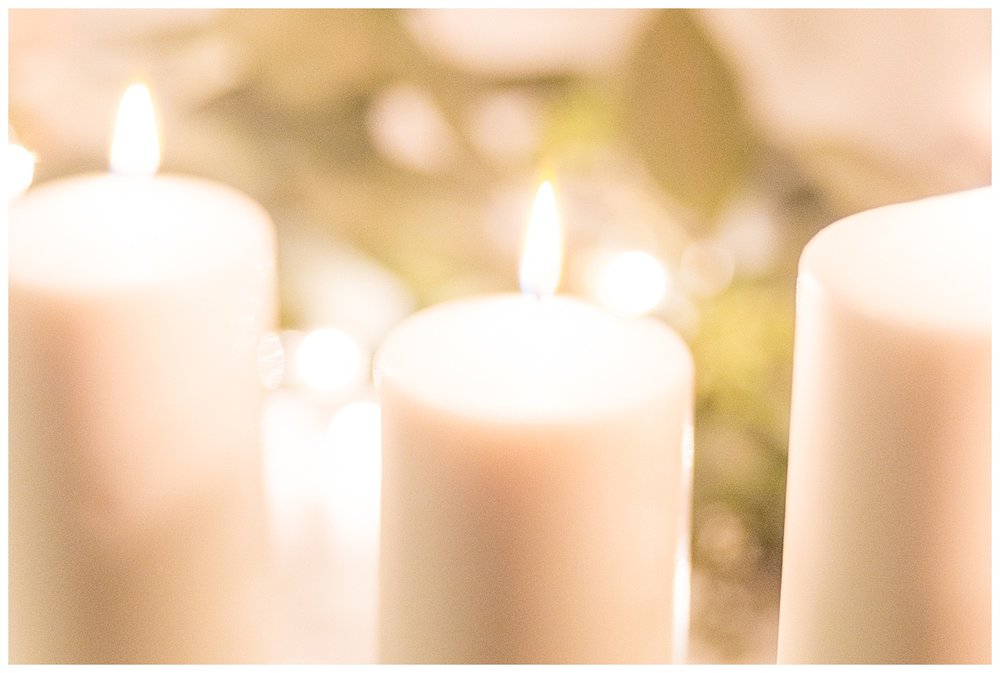
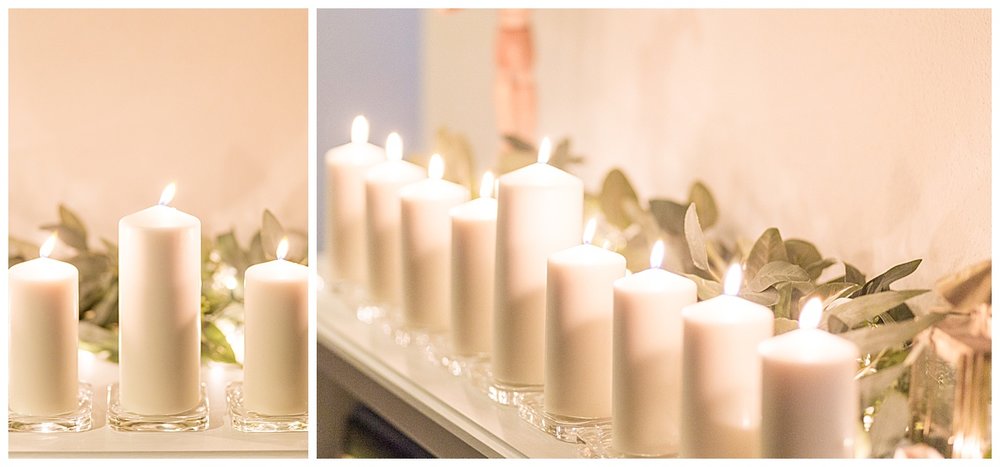
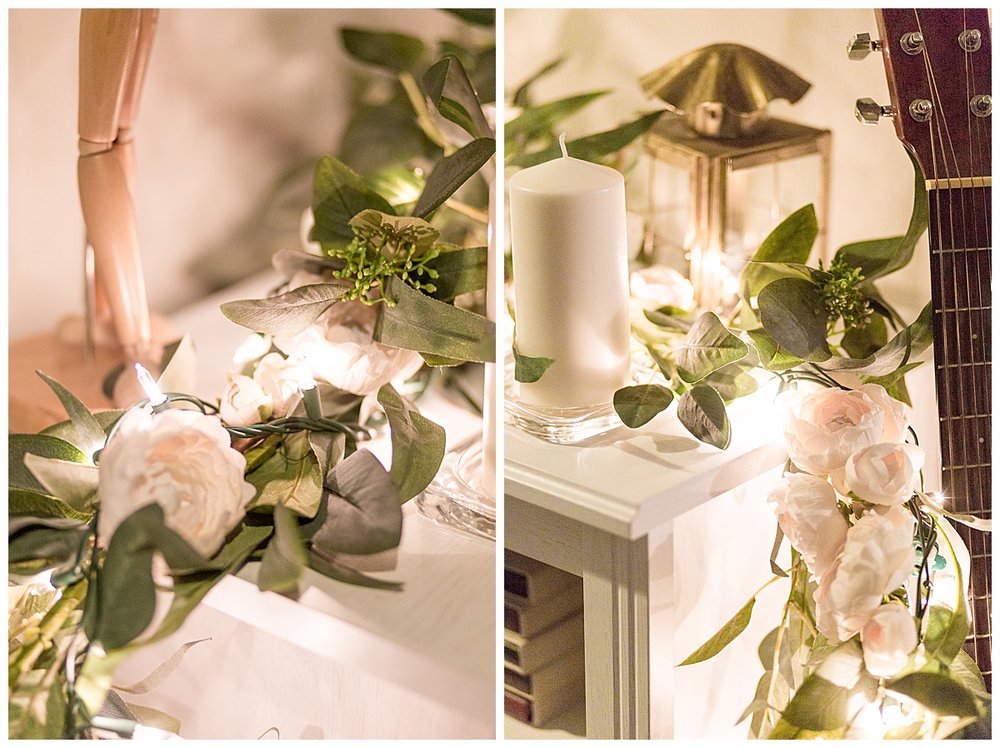
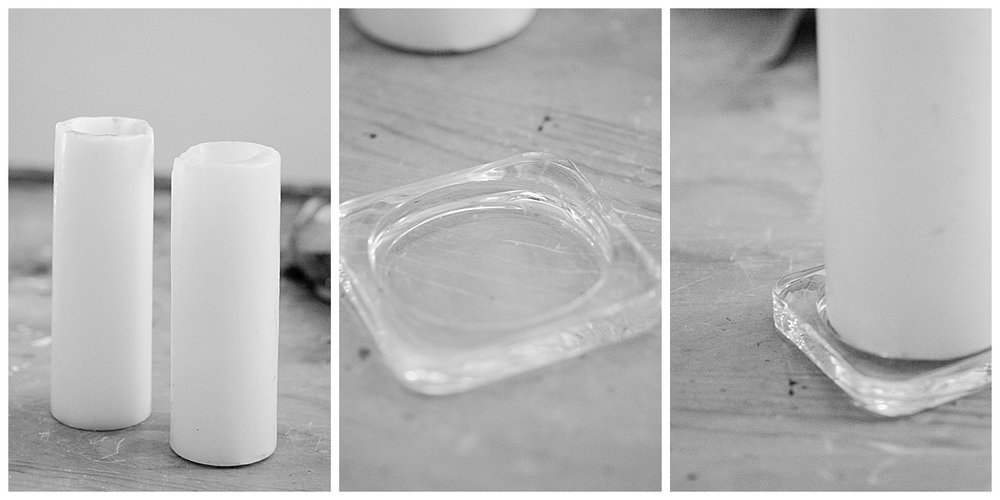
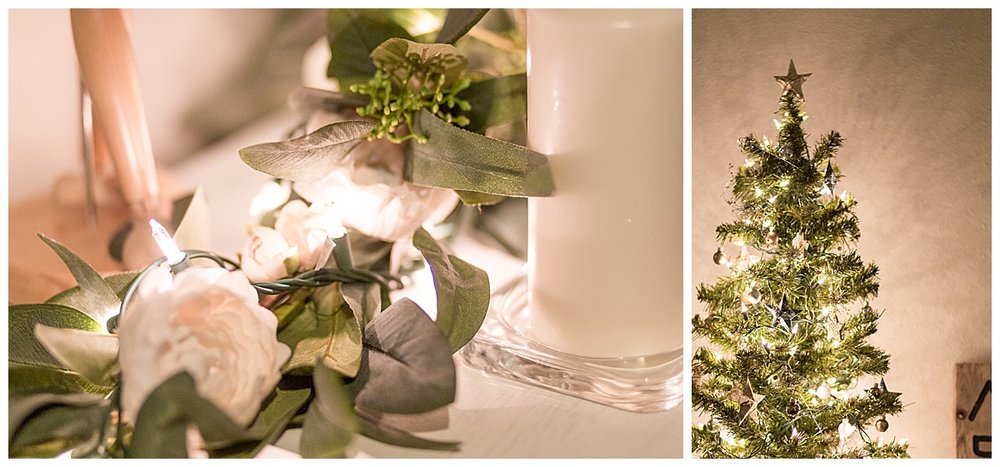
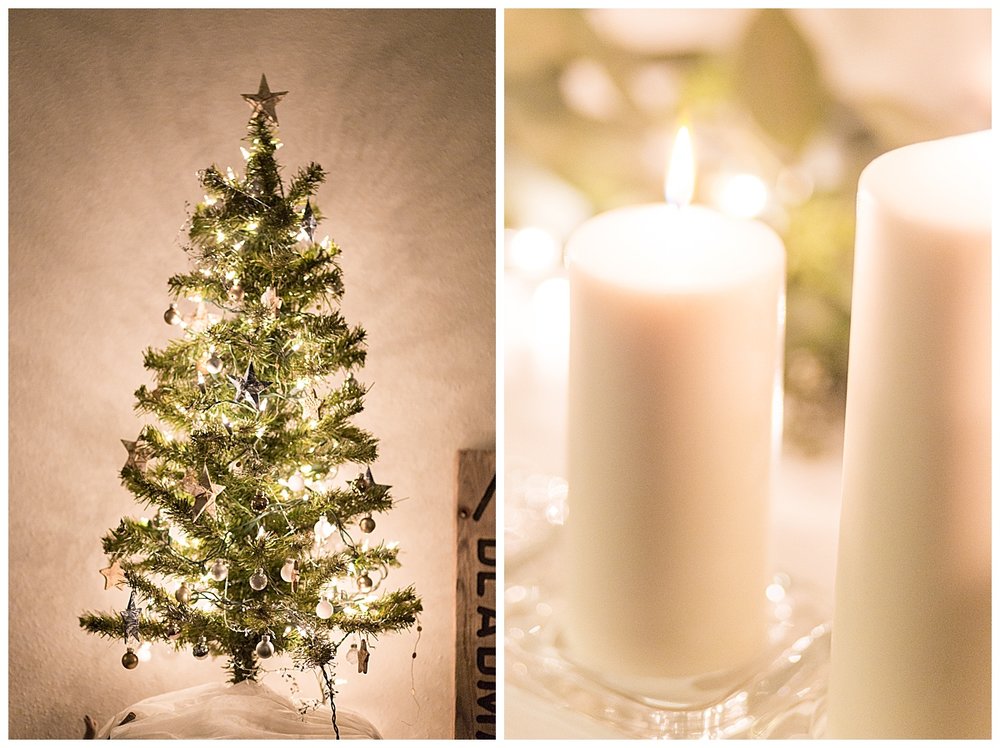
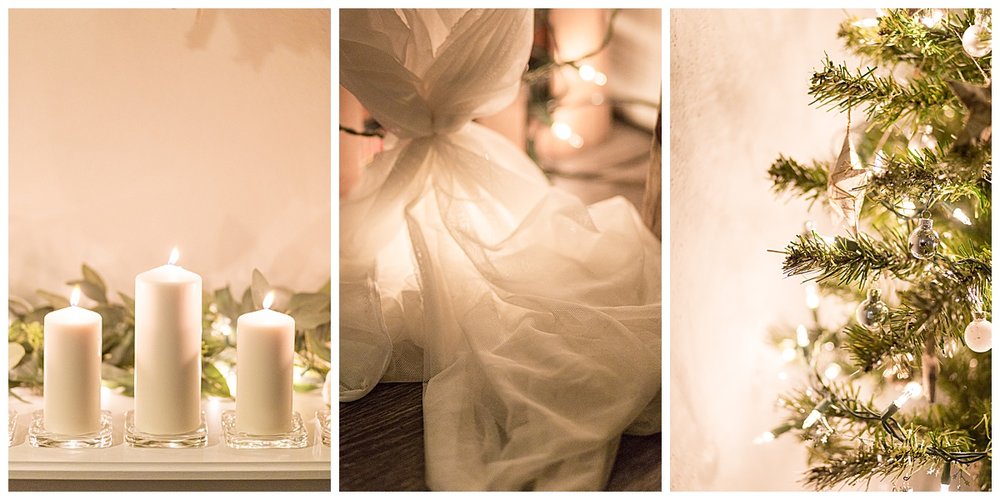
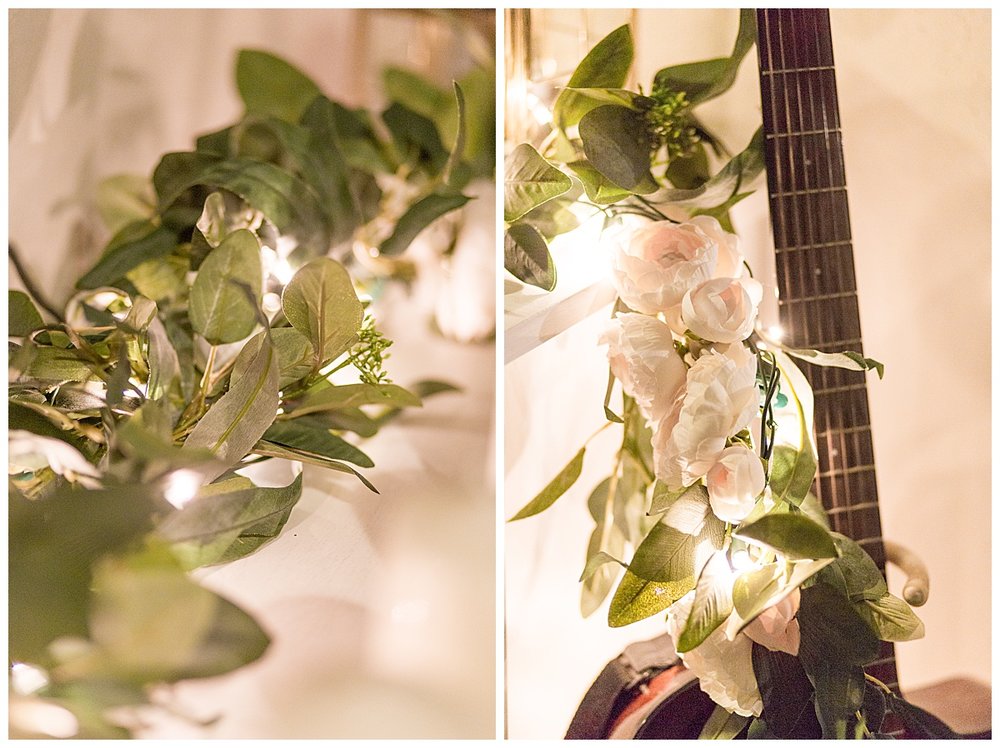
In lieu of a traditional menorah I purchased 9 pillar candles from IKEA (They were super inexpensive), and got the glass bases for them to sit on. All lined up they make a really stylish “minimalist” menorah. I accented the space with a garland I got on clearance at Target. Using wire I attached some white (faux) flowers and then wrapped it in a strand of twinkle lights. I threw one of the lanterns behind it, added a figure drawing model holding an ornament for a touch of humor, and called it good.
Super simple, and so pretty!
Materials:
-
9 Pillar Candles (8 shorter, 1 tall)
-
9 class bases for the candles
-
1 or 2 faux eucalyptus garlands (I used 2 for a bit more volume)
-
A bunch of faux flowers in a color and type you like
-
Small gauge wire for attaching the flowers to the garland
-
a strand of twinkle lights
-
Accents like a lanterns or figure drawing figurine
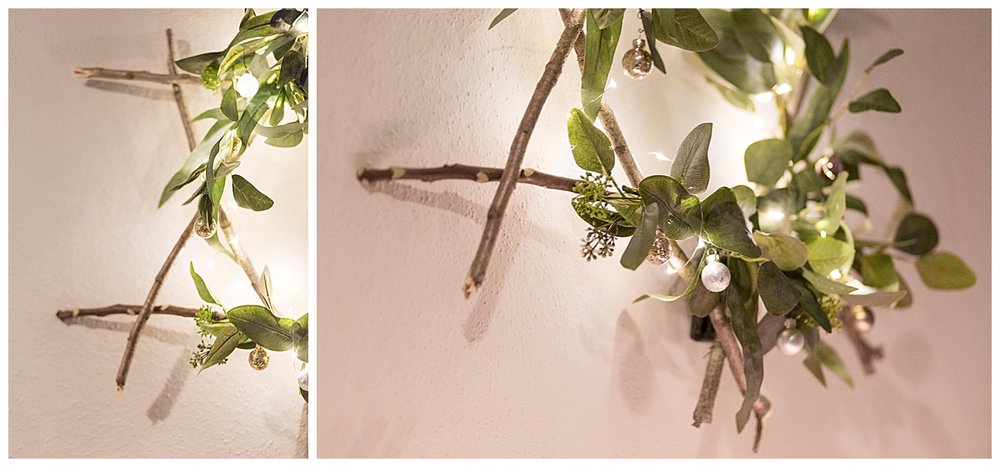
The “Wreath”:
The next thing to make was a Hanukkah “wreath” to fill the wall above the sideboard. I had made a similar thing last year but ended up throwing it away when we moved in June.

Materials:
-
6 sticks of equal thickness and length
-
fishing line, small gauge wire, or twine
-
Hot glue gun and additional glue sticks (if needed)
-
Faux greenery or a garland
-
1 strand (or 2) or battery powered twinkle lights
-
small ornaments or accents
To start this project you need to have all your sticks in order. I found my sticks in the woods (<- that was not meant to be ironic) by our apartment. There was a conveniently dead tree with conveniently uniformly thick branches that I was just able to break off and bring inside. I think only was person saw me and thought I was a bit nuts walking out of the woods with an armload of sticks. Anyways, yeah, you shouldn’t have to go far to find your sticks. If you can’t find them outside then I don’t know what to tell you. I’m sure there is some home decor store that sells sticks and charges a million and a half dollars for them.
For this project I made one large and one small star.
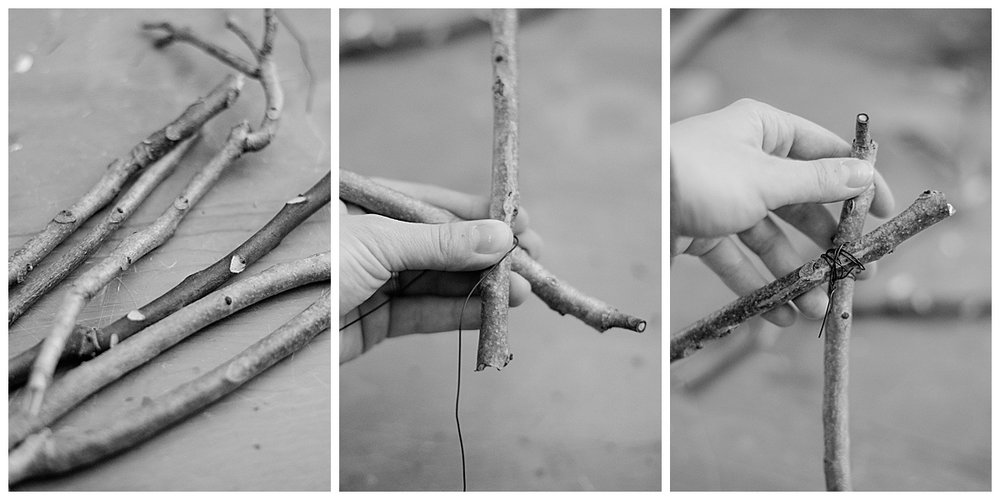
Now that you have your sticks take two of them and cross them so they form a 60 degree angle. Hold them in this position and use wire or fishing line to wrap around them and tie them into place. I used fishing line because I wanted it to be nearly invisible. I found that although the wire was easier to handle, the fishing line tied the sticks more securely to each other. If you’re struggling with holding the sticks while you tie them together, you can use hot glue and glue them so they are stuck while you tie them. You still have to wrap and tie them with wire or fishing line, because the glue won’t hold them for a long time, but it will make things easier!
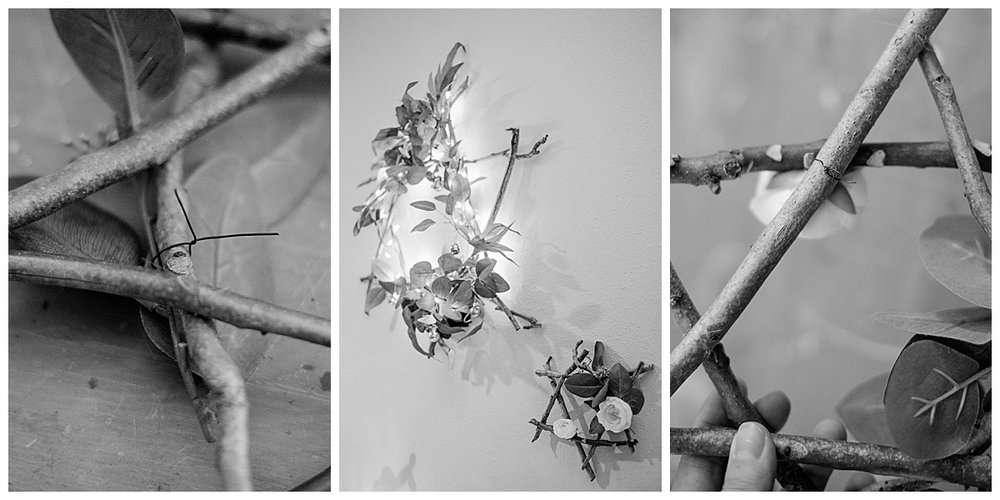
Complete this step until you have made 2, equilateral stick triangles. Once you’ve got your stick triangles made its time to assemble your Star of David. This is super easy as you just have to lay one on top of the other and wire them together to form a star. Now that you’ve got your star made it’s time to decorate it!
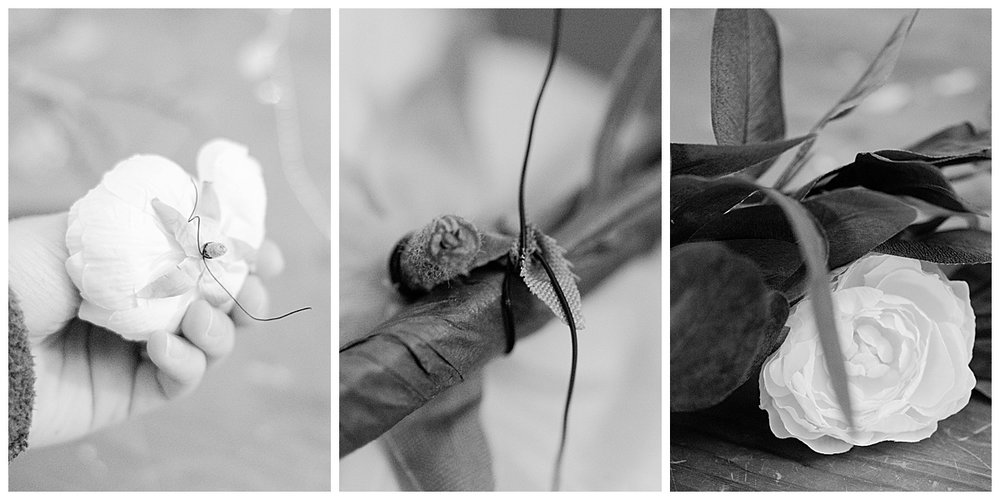
How you decorate your star is really up to you. I chose to add some of the same garland I used for the sideboard decoration. I attached that with the wire and a little help from a hot glue gun. After attaching the garland on the large start I wove in a strand of battery powered twinkle lights, and added some mini bulb ornaments. On the small start I wired on some of the same garland and then two of the same white flowers I had put on the garland for the sideboard. Then TA-DA, they were wall-ready! I am super happy with them and will be making a point to find a box that they will fit in, so I can store them for next year (and not have to make a new one)
A small piece of wire or fishing line is all you need to attach your garland.
ALL the heart eyes for this <3
I will definitely be going to get another strand of twinkle lights for the small star! It adds that extra bit of sparkle that I LOVE!
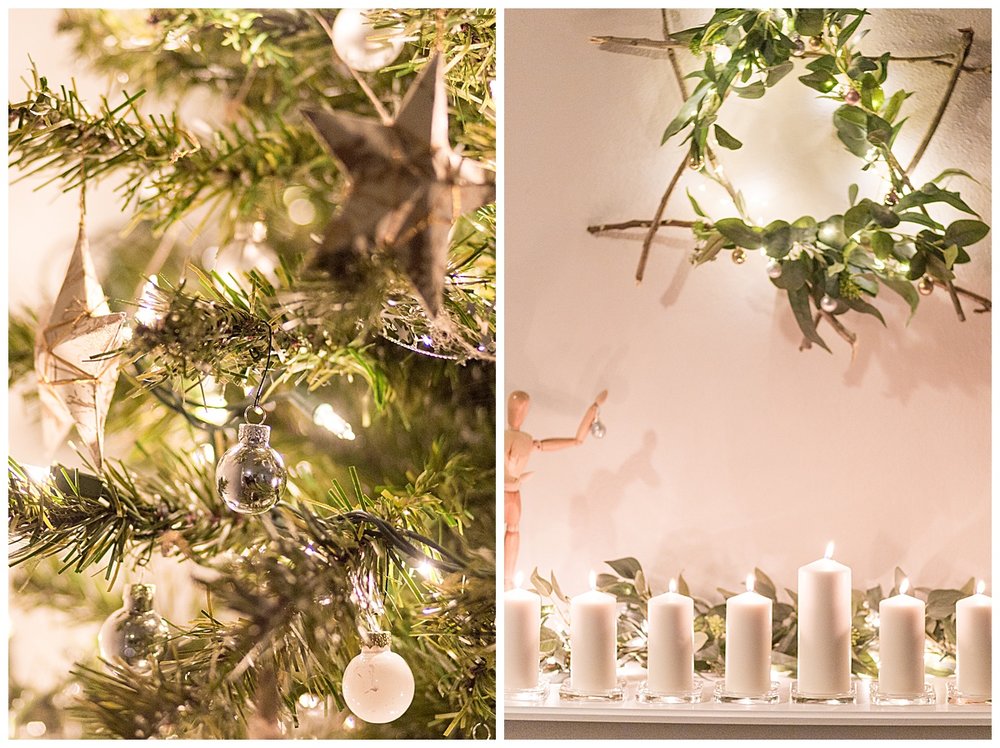
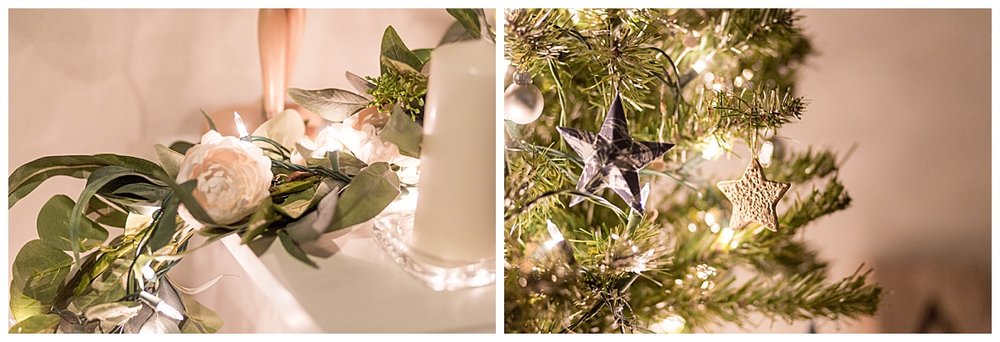
The Tree:
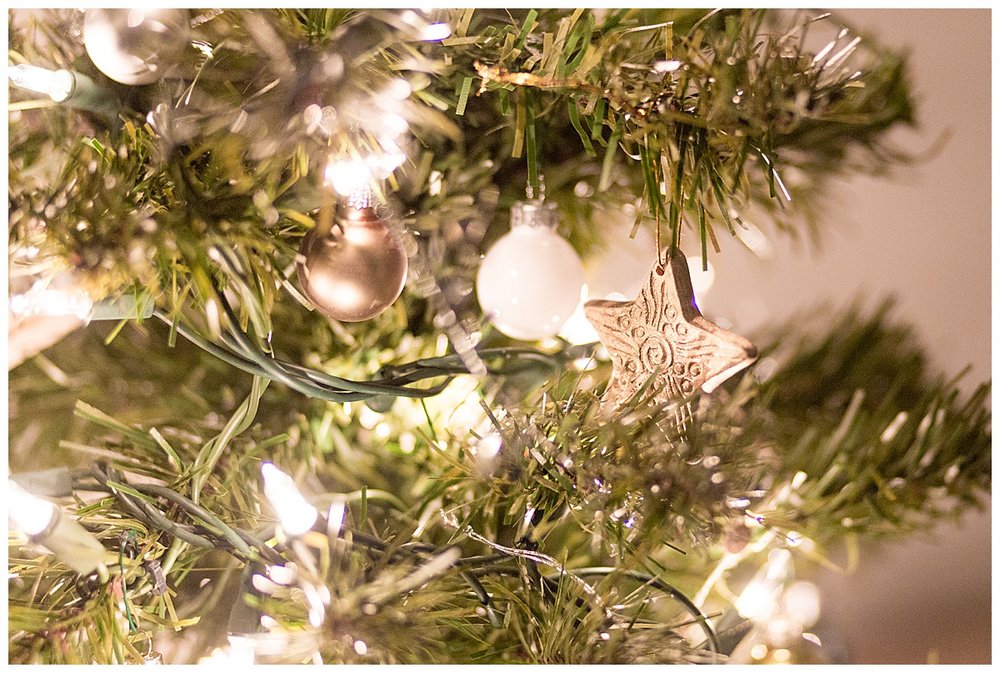
I’m not going to waste my finger energy typing an explanation of how to decorate a tree. What I will say about it is that I made it Holiday-neutral but foregoing any blatantly Christmas or Hanukkah things and instead opting for a silver and gold color scheme to go with the rest of the decor. The stars are from Ten Thousand Villages, and the small bulbs are from Christmasland at Target ($3 for a box and they’re super cute). A milk crate made the perfect stand for the little tree, and a piece of tulle I had from a bridal show setup covered the eyesore of a plastic base rather nicely.
Materials:
-
1 pre-lit mini Christmas tree from Target
-
1 strand of twinkle lights (the lights on the tree just didn’t cut it for me)
-
A crap load of mini bulb ornaments in gold, white, and silver
-
A few star ornaments (I made 1 into a topper for the tree)
-
Nice fabric to cover the base
-
Milk crate or something to elevate the tree since it’s smol (<- that’s millennial slang for small)
LASTLY!
The best part of the whole thing is that I connected all of the lights to automatic timers, to save my own energy from turning them off and on, and save the electric kind of energy (because that’s good to do too).
There you have it folks! That’s probably the extent to which I’ll decorate for the Holidays because I just don’t have space for anything else, but if I add something I’ll make sure to post about it!
Cheers, and happy Holidays!
Sarandon

Add a comment
0